Flocking
of Celestron C14 optical tube
 Move mouse over picture
for labels
Move mouse over picture
for labels
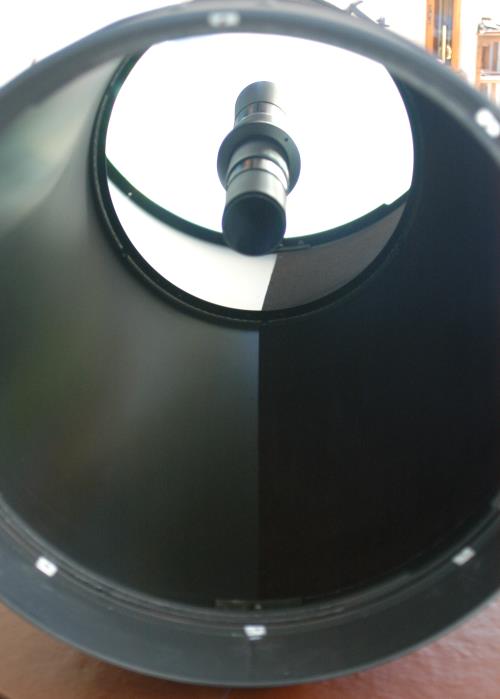
ProtoStar flocking
paper inside of my C14 ota.
First I had to remove the front corrector plate. This required
removing the phillips screws holding the corrector plate retaining ring
and removing the ring. Then I marked the position of the
corrector plate in the tube with a black marker by making a mark on
the previously covered portion of the corrector plate and corrector
plate cell. Loosened 3 of the nylon collimation screws in the
corrector plate cell to allow the
corrector plate to move from side to side. If the corrector plate
does not move take a large flat blade screw
driver and nudge the corrector plate from the cell using a very slight
twisting action at various gaps between the cell and the corrector
plate. It is important
not to use a prying motion, this could
chip the corrector plate. Once the corrector plate was
loose I
removed it by grabbing the secondary housing and pulling it out.
Set it aside in a safe
clean place.
I decided to flock the tube in 3 sections to make it easier to stick
the self-adhesive flocking paper to the tube. The paper was cut
21" long and 17" wide, the 21" side goes the length of the tube.
Rolled back 2" of backing from the 21" length side and lined it up with
the seam at the bottom of the tube. Started at back end, close to
the mirror, and worked my way up. Then pealed the backing off a
little at a time and began pressing the paper on the tube. The
next 2 pieces were overlapped by about 3/4" and super glued to the
previous piece. I rotated the tube so the flocking paper was
applied at the bottom for each piece.
Reinstalled the corrector plate, tightened the collimation screws in
the cell
and attached the retaining ring.
Use this procedure at your own
risk. I assume no responsibility for you doing damage to your
scope. This procedure worked for me and was not hard to do but I
do have many years experience taking telescopes apart and building them.
William
E. Rison